What is Browser Extension?
An extension is a mini software tool for modifying a web browser. Many extensions are available, including user interface, modification, add blocking and screenshot. It can include multiple tool and a number of functions in a single extension.
How can we make an extension?
manifest.json
The manifest file is a simple JSON file that interacts the browser about our extension and how it should behave when installing in our mobile device or desktop browser.
You define metadata about our extension such as the name, version, background scripts, content scripts, browser actions, browser permission, icons etc. and more configuration.
All extension has a JSON manifest file, it is named manifest.json, it provides information about your extension.
You should store in your root of extension directory.
{
  "name": "Personal Note",
  "description": "we can save simple note.",
  "version": "1.0",
  "author": "Ramesh Vaniya",

  "icons": {
    "32": "icons/icon32x32.png"
  },
  "browser_action": {
        "default_title": "Personal Note",
        "default_icon": {
          "32": "icons/icon32x32.png",
          "16": "icons/icon16x16.png",
          "12": "icons/icon12x12.png"
        },
    "default_popup": "option.html"
  },
    "content_scripts": [
    {
      "matches": [""],
      "css": ["styles/style.css"],
      "js": ["scripts/background.js"],
      "run_at": "document_start"
    }
  ],
  "permissions": [
    "activeTab",
    "storage",
     "identity"
  ],
"content_security_policy":"script-src 'self' https://www.gstatic.com/ https://*.firebaseio.com https://www.googleapis.com; object-src 'self'",
  "manifest_version": 2
},
"oauth2": {
    "client_id": "yourclient_id.apps.googleusercontent.com",
    "scopes": [
      "https://www.googleapis.com/auth/userinfo.email",
      "https://www.googleapis.com/auth/userinfo.profile"
    ]
  },
"key":"Public key"
Explanation of above file in brief
-
name: it is the name of the extension, you can see in the manage extension page.
-
version: it is a version of the extension, you can see in the manage extension page.
-
description: it is a description of your extension.
-
background: if you need required external script then you can define in scripts JSON object like above.
-
browser_action:
-
default icon: it is your extension icon and you can see in the top right side of your browser after installed.
-
default_popup: it is your default popup. when you click on your extension icon it will show popup of extension.
-
-
permissions: you should give permission of related extension required.
-
Content_scripts:
-
matches: it specifies the URL patterns to be matched for the scripts to be loaded
-
CSS: This option is to load multiple stylesheets by a comma separated
-
JS: This option is to load multiple scripts by comma separated
-
run_at: This option is for when the scripts specified in the script are loaded. Each of which identifies a state in the process of loading a document.
-
It is default value “document_idle”.
-
“document_idle”: The document and all its resources have finished loading.
-
“document_start”: The DOM is still loading, it is loading to start loading of page.
-
“document_end”: The DOM has finished loading, but resources such as scripts,stylesheet and images may still be loading.
-
-
Content_security_policy:
We need to allow access external URL or API otherwise we will not be able to access other API
-
Oauth2:
It is used to authenticate the user and access their profile information like username, email, access token, etc.-
Client_id: You should set Google client id, we can get it from google console.
-
Scopes : you give permission to access your profile information
-
-
Key: We can get it from Google Extension Store (only for google chrome browser)(
https://chrome.google.com/webstore/developer/dashboard

It is required to run in local PC but when you upload to Chrome store it is not required.
Manifest.json file has many options , we can use these options as per our requirement in custom extension.
I have added few options in above manifest.json file.
Use Firebase for storage
We store data in our local browser storage but sometimes we need to access our data from other device or other browsers at that time we required to store data in the server so we can use firebase server for store data to real-time update all devices.
Firebase is good for data store without writing server-side API.
We don’t need to add constraints on our DB design or even worry about authentication rules.
Firebase Database rules are pretty awesome for most of our needs when we are starting out. Backing up and restoring the database is also very easy.
Firebase settings
-
- Go to https://console.firebase.google.com
-
We can store notes in firebase database so you should create a project (database) in firebase.
-
You can click on your created database name from the firebase database list.
-
-
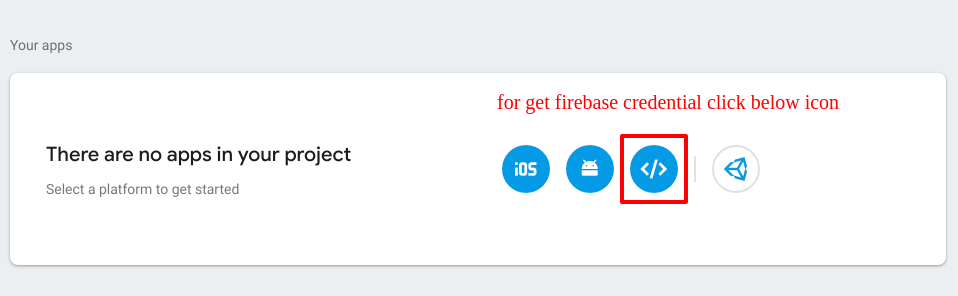
First of all, we need to get the API key and database URL to store notes in our database.
-
We use firebase javascript SDK for data manipulation like store, retrieve, delete and update records etc.
-
You can easily connect firebase database, you need to import firebase js file and firebase database credential.
-
Go to firebase console dashboard then go to setting page from sidebar.
-
var config = {
apiKey: “your api key”,
authDomain: “extension.firebaseapp.com”,
databaseURL: “https://extension.firebaseio.com”,
projectId: “extension”,
storageBucket: “extension.appspot.com”,
};
-
-
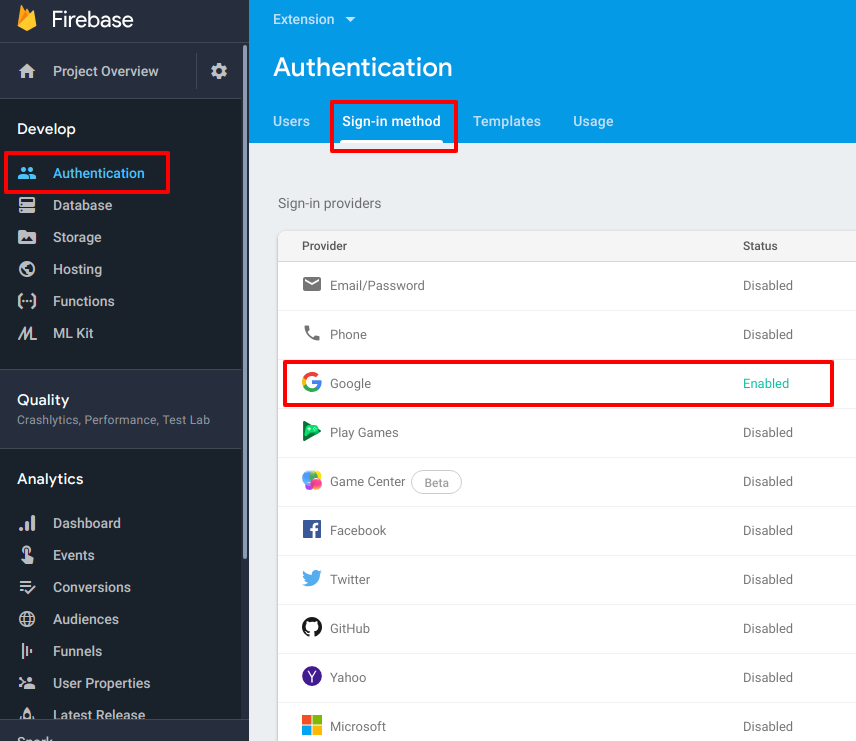
Login method
-
Firebase provides several methods to authenticate like google, facebook, twitter, yahoo, github etc.
If you want to create custom login method then you can create register user functionality yourself.
-
We must use firebase method to store, retrieve, update, delete data in JSON format.
To store data in firebase database
-
-
Firebase Realtime Database
-
Firebase Realtime Database allows syncing data across all the clients in real-time
-
That real-time Database is a cloud-hosted database. Data is stored as JSON format and synchronized in real-time to every connected client side resource.
-
All of your clients share one Realtime Database instance and automatically receive updates with the newest data.
-
-
-
Firebase cloud firestore database
-
Cloud Firestore is advanced data store technique. It is similar to Firebase Real-time database that is structured as a JSON tree but cloud Firestore stores data in documents (it is a set of key-value pair) and collection (it is a collection of documents) format.
-
We can manage Complex, hierarchical data which is harder to organize at scale in realtime firebase but in Cloud FireStore, Complex, hierarchical data is easy to manage at scale, using sub-collections within a single document.
-
Google chrome setting:
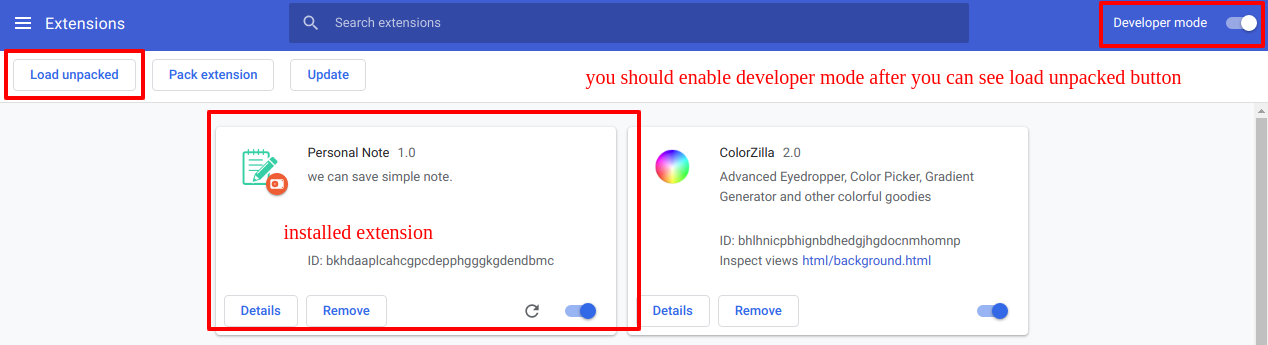
The last step is to install the extension on your local machine.
Go to chrome://extensions in your browser. You can also access this page by clicking on the Chrome menu on the top right side three vertical dot icons, More Tools and select Extensions.

-
Check the box next to Developer Mode.
-
Click Load Unpacked Extension and select the directory for your “extension directory” extension.
Google console (https://console.developers.google.com):
Go to the Google API Console.
-
Select a project, or create a new one. Use the same project for your extension.
-
Click Go to credentials.
-
Click New credentials, then select OAuth Client ID.
-
Select a Chrome App then add name and your extension ID.
-
You can get Extension ID from installed extension(you can see in above image).

Upload extension:
https://chrome.google.com/webstore/developer/dashboard
You can see the below image when you publish first time of your extension to server. Click on add new item button and when you update the extension, you click on the edit button.

You click on add new item button or edit link in extension dashboard page and you will see below image.
You need to add extension logo, description, screenshot, category of extension, language, paid or free etc.

https://developers.chrome.com/webstore/publish
You must pay a one-time $5 for google chrome store registration fee.
https://chrome.google.com/webstore/detail/bbcencfbimebbbmlpaokmndbegmecghd
Firefox Browser Settings:
-
Enter “about:debugging” in the URL bar
-
Click “Load Temporary Add-on”
-
Open the directory of extension and select any file inside the extension.
-
-
Uploaded extension in firefox
-


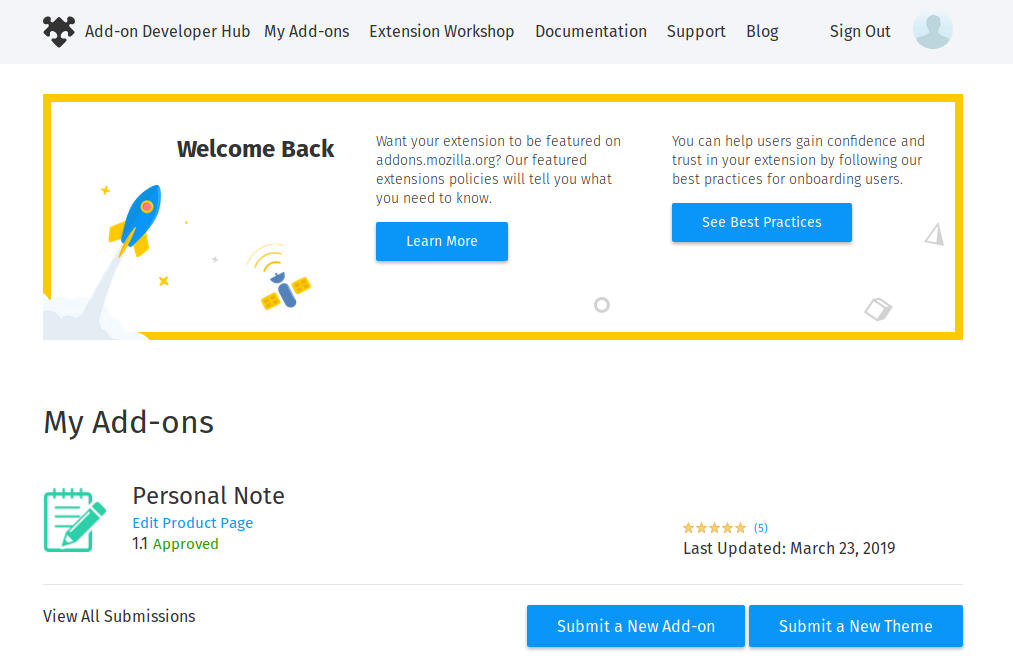
Upload extension to firefox:
Go to below url to publish your extension in Firefox store
https://addons.mozilla.org/en-US/developers/
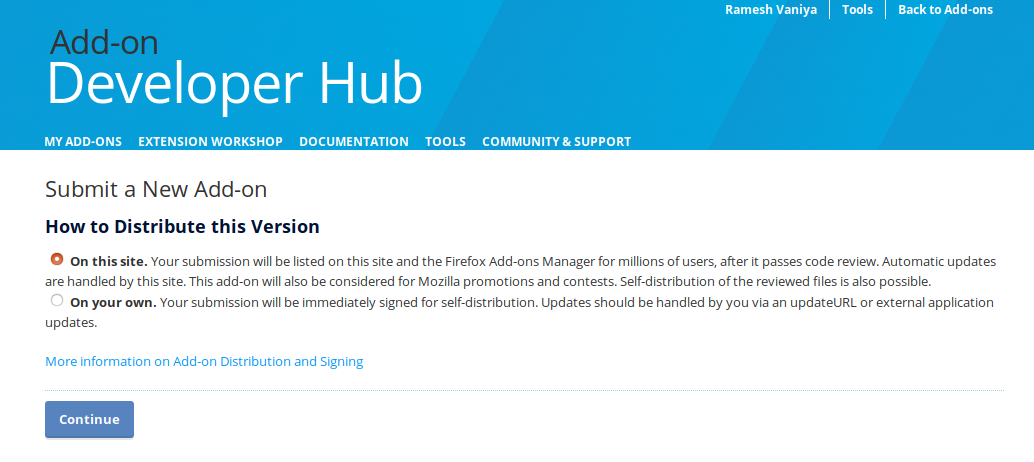
Add add-on in firefox store:
They provide two types of option as displayed in below image.
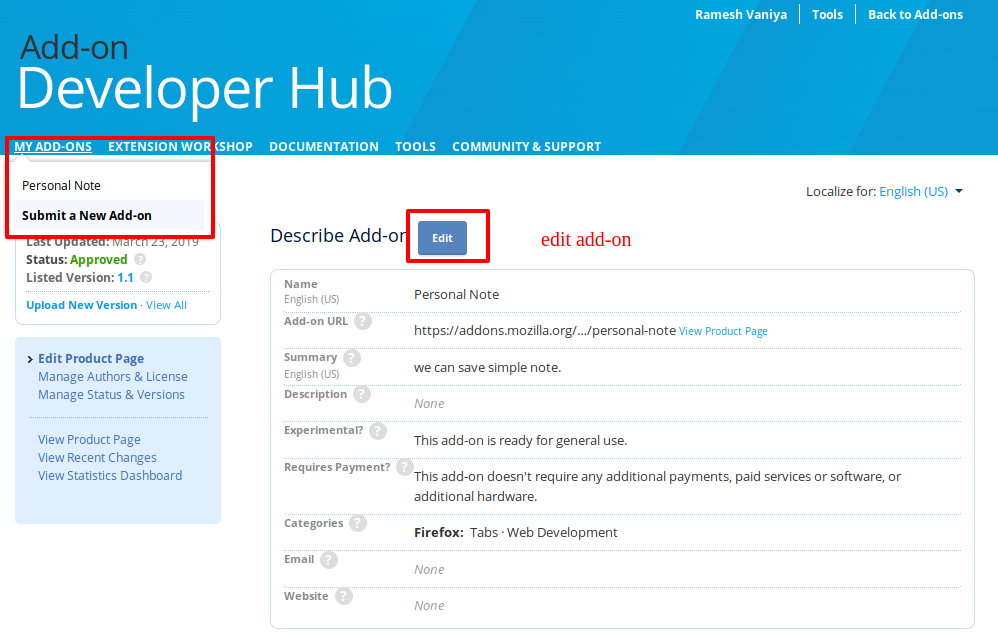
After upload your add-on in firefox store you will need to update your add-on you can edit or update your extension.
https://addons.mozilla.org/en-US/firefox/addon/personal-note
https://developer.mozilla.org/en-US/docs/Mozilla/Add-ons/Distribution/Submitting_an_add-on

Congratulations! You can now use your popup-based extension by clicking the note icon.
Finally, I hope this blog will help to all. If you have any query or suggestions please comment below.
Finally, here is GitHub Repo for the above code.