So the purpose of this post is to get a brief idea on what is ElasticSearch and how easily we can start and get going on to it. We can find lots of things on their website but I will cover just few theory parts here and CRUD in Elasticsearch with React JS. We are going to do direct Elasticsearch connectivity from React JS.
What is ElasticSearch in easy terms?
Consider ElasticSearch as Database, we can do Create, Read, Update, Delete on it easily. It just like MongoDB which stores JSON documents inside it.
When we need to use it?
So the question is why and when we need to use it?. So MongoDB or any other database has some limitation when there is a huge amount of Data especially in case of Search. Consider you want to store JSON document with around 1TB of data and want to search inside it. That’s where ElasticSearch comes into the picture.
ElasticSearch is best to provide query result within 1 to 2 second with 1TB of data. Isn’t it amazing?
So if you have a huge website with lots of content in it, then to give quick Search Result from whole website data, ElasticSearch is the tool you need to use.
Getting quick idea on its Technical Terms
So if its like Database then what is Table and Records inside?
Index
ElasticSearch table is called Index. Index is collection of documents.
Document
Rows are considered as Document.
Ok, I think that’s it for the theory part. Let’s dive into Code Part.
Installation, Creating First Index and WebUI Introduction
Step 1: Installation
If you don’t have installed ElasticSearch than go To ElasticSearch Installation Page and install this in your system. Once you have installed and running Elasticsearch in the background in the next step there are some CURL commands to get going.
Step 2: Some curl command
> HealthCheck: should return some results with statistic about health of our elasticsearch node
$ curl -X GET “localhost:9200/_cat/health?v”
> List of Indices: It will be used to list all indices. Index
$ curl -X GET “localhost:9200/_cat/indices?v”
> Create First Index: For this demo we need to create index with name crud
$ curl -X PUT “localhost:9200/crud?pretty”
$ curl -X GET “localhost:9200/_cat/indices?v”
that’s all we needed now from terminal. In the next part, we will discuss WebUI for Elasticsearch.
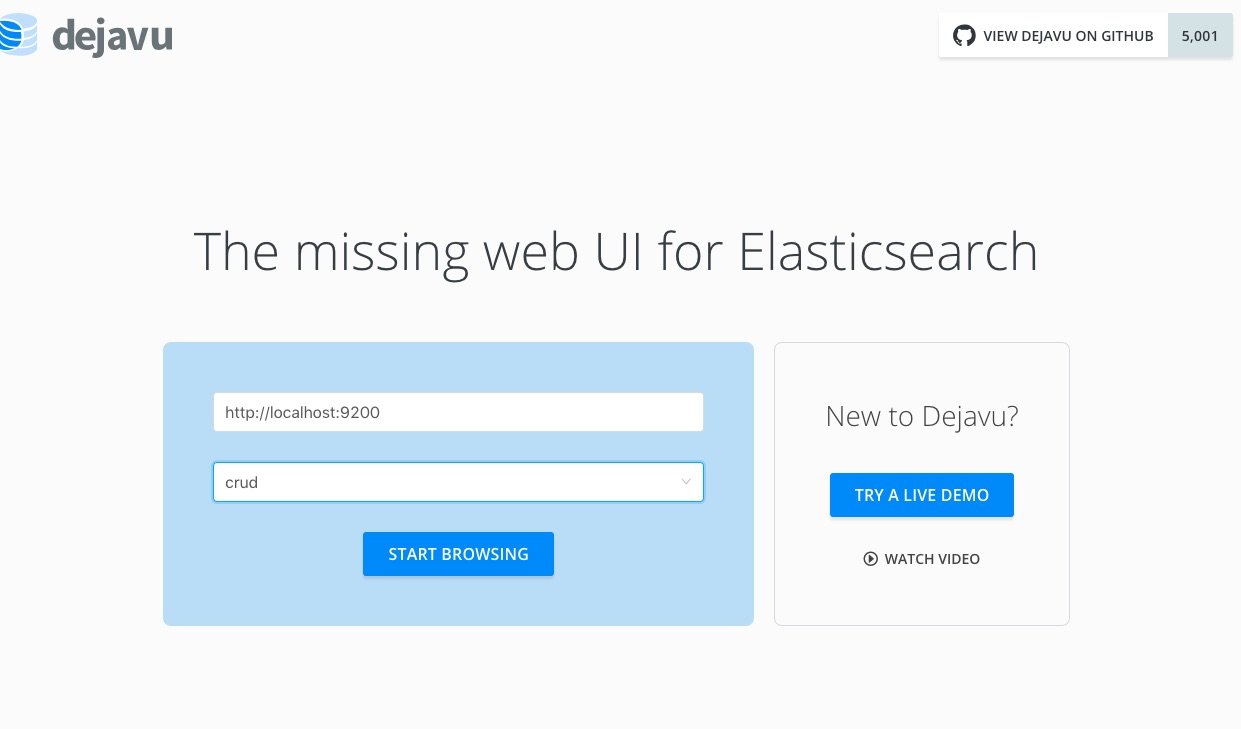
Step 3: Dejavu WebUI
Dejavu WebUI is chrome extension which is best for now. To connect our Elasticsearch node put in as screenshot.
This should open up UI from where you can tinker with documents.
Elasticsearch connectivity from ReactJS
Step 1: Create react app as usual and install Elasticsearch module
$ npx create-react-app elasticsearch-react-crud
$ npm install elasticsearch –save-dev
Step 2: Configure our react app for Elasticsearch using elasticsearch.Client
var elasticsearch = require('elasticsearch');

var client = new elasticsearch.Client({
    host: 'http://username:password@host:port/'
    // http://localhost:9200/
    // http://root:12345@localhost:9200/
    // If you have set username and password
});

// Check if Connection is ok or not
client.ping({
    // ping usually has a 3000ms timeout
    requestTimeout: Infinity,
}, function (error) {
    if (error) {
        console.trace('elasticsearch cluster is down!');
    } else {
        console.log('All is well');
    }
});
Find out even more connection parameters here
Step 3: Search, getting required data from Elasticsearch
client.search({
    index: "crud", // Your index name for example crud
    type: "doc", // Your index name for example doc
}).then(function (resp) {
    console.log(resp.hits.hits);
}, function (err) {
    console.log(err.message);
});
Step 4: Create, Update, Delete records in elasticsearch
payload = {
    "user": "elastic",
    "post_date": "2010-01-15T01:46:38",
    "message": "any message"
}
client.index({
    index: "crud",
    type: "doc",
    refresh: true,
    body: payload
}).then(function (resp) {

}, function (err) {
    console.log(err.message);
});
– For create documents we use client.index method in this method we have passed :-
index for index name
type for documents type
body for object of documents
refresh to true >> Important if we need to fetch same record immediately
– You can also pass id params If id param is not specified, Elasticsearch will auto-generate a unique id.
Edit
payload = {
	"doc": { // for update this is required
		"message": evt.target.value
	}
}
var _id = this.state.id;
client.update({
	index: "crud",
	type: "doc,
	refresh: true,
	id: _id,
	body: payload
}, function (err, resp) {
	if (!err) {
		that.getElasticSearchData();
	} else {
		console.log(err);
	}
})
Delete
client.delete({
	index: indexName,
	type: docType,
	refresh: true,
	id: ch._id,
}, function (err, resp) {
	if (err) {
		console.log(err)
	} else {
		that.getElasticSearchData();
	}
});
This is what we have build so far, now you are almost ready to start with technology you love.
As Always we have GitHub source code link is ready to grab it easily. Would love to hear feedback from you. Thank you.