When push notification arrives in an iOS app, you may want to be able to download content in response to it or edit the content before it is shown to the user. In iOS 10 and later, Apple allows apps to do using new Notification Service Extension.
This guide will help you to setting up project to display image in notification banner.
Setting up App Group ID and App ID
Setting up Xcode project
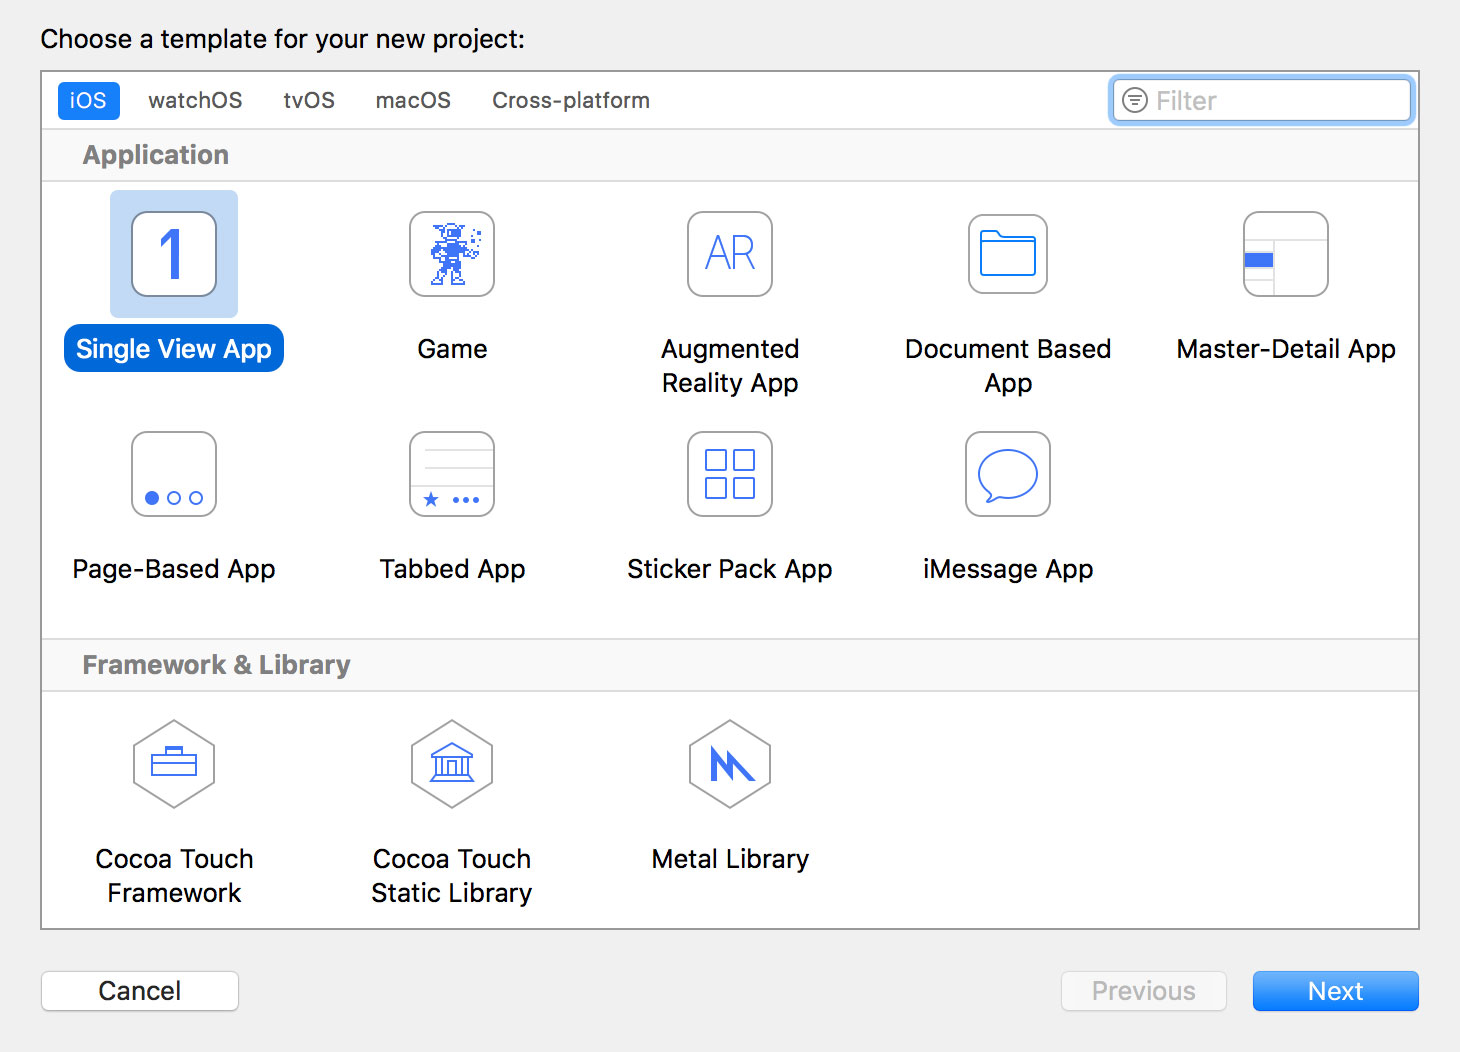
In Xcode, create new app of type Single View App.
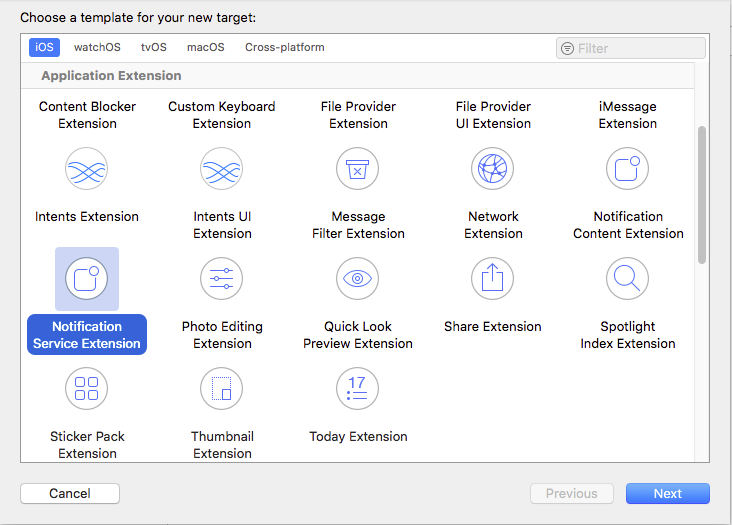
Create Notification Service Extension
In the Xcode menu bar, go to File > New > Target… and select the Notification Service Extension template from the menu that appears
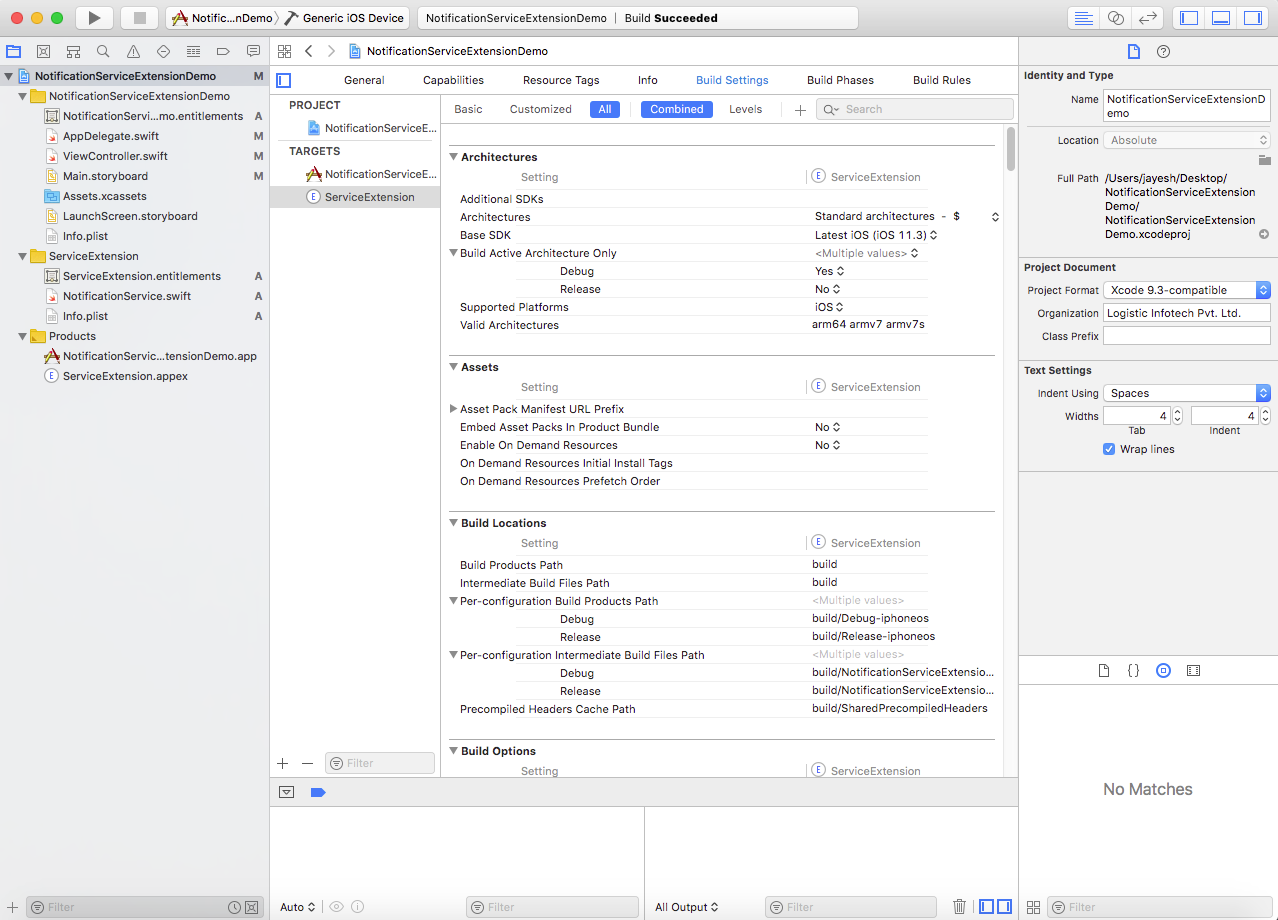
After you create extension, you will see two files in Xcode Project navigator
- NotificationService.swift
: contains code and logic of extension - Info.plist : configuration
details of extension
Enable main app push notification and app group capabilities
Go to your xcodeproj in Xcode, select Capabilities, and turn ON Push notifications.
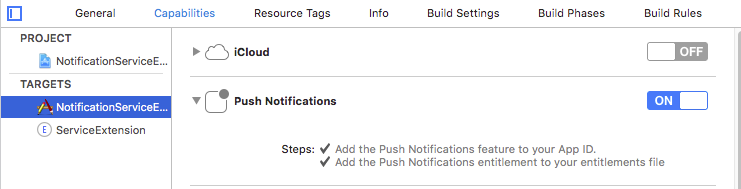
and turn ON App Groups.
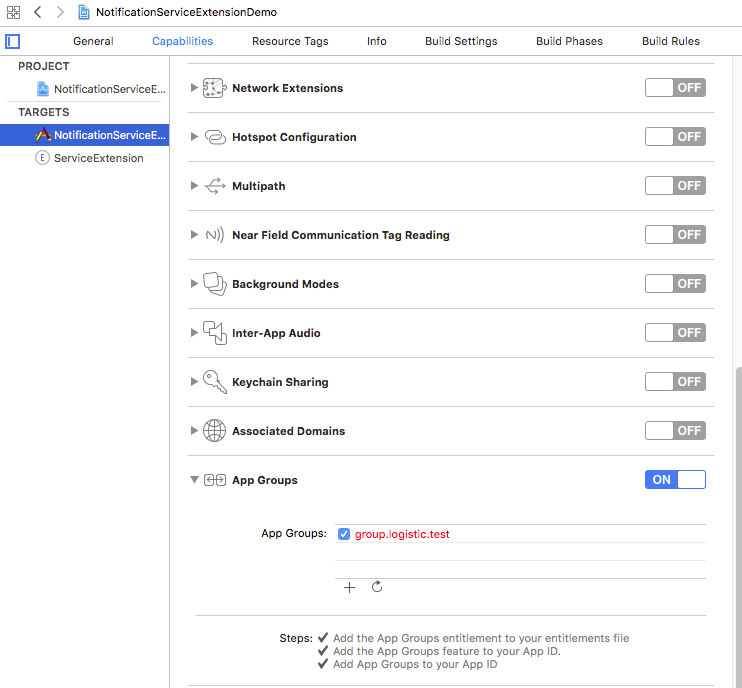
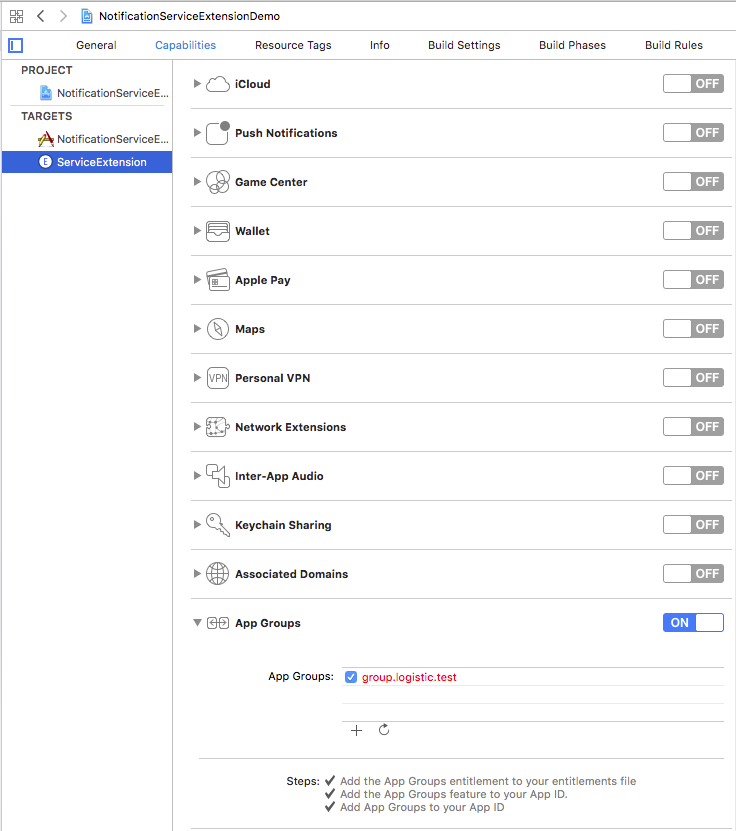
Enable extension application app group capability
Also turn ON App Groups from extension target.
After enable capabilities entitlements file look like this
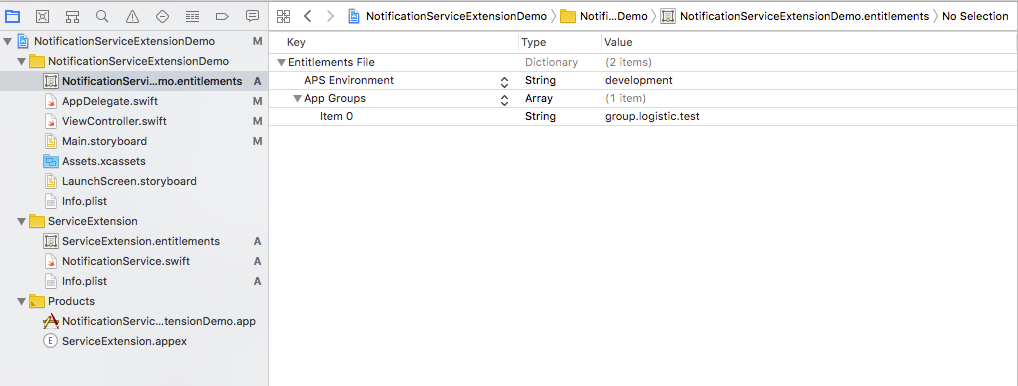
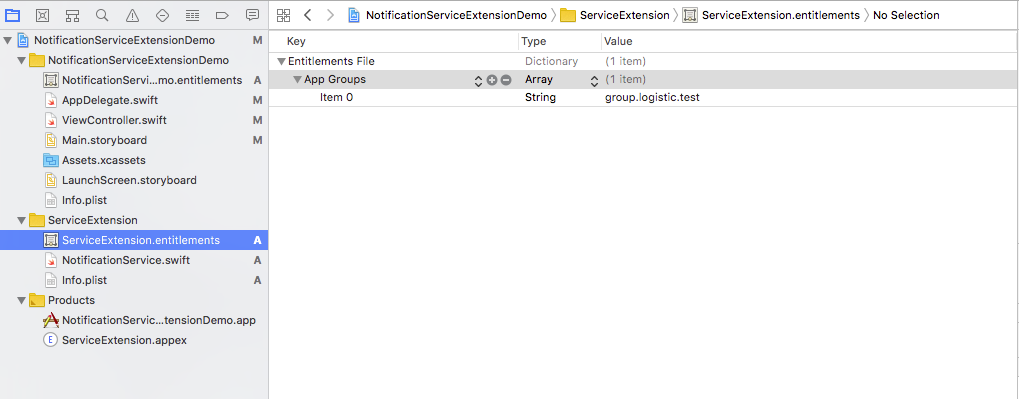
(Note: if app group not displaying capabilities then you can add manually from file)
Register push notification in AppDelegate
UNUserNotificationCenter.current().delegate = self

if #available(iOS 10, *) {
     UNUserNotificationCenter.current().requestAuthorization(options:[.badge, .alert, .sound]){ granted, error in }
} else {
     application.registerUserNotificationSettings(UIUserNotificationSettings(types: [.badge, .sound, .alert], categories: nil))
}
application.registerForRemoteNotifications()
Add the didRegisterForRemoteNotificationsWithDeviceToken function in your AppDelegate.swift file to get the deviceToken, which will receive notifications.
func application(_ application: UIApplication, didRegisterForRemoteNotificationsWithDeviceToken deviceToken: Data) {

    let deviceTokenString = deviceToken.reduce("") { $0 + String(format: "%02X", $1) }

     print("APNs device token: \(deviceTokenString)")

     // Persist it in your backend in case it's new
}
func userNotificationCenter(_ center: UNUserNotificationCenter, didReceive response: UNNotificationResponse, withCompletionHandler completionHandler: @escaping () -> Void) {
    completionHandler()
}
Extension Lifecycle
Once you have configured your app with a notification service extension, the following process will take place for each notification.
- App receives notification.
- System creates an instance of your extension class and launches it in the background.
- Your extension performs content edits and/or downloads some content.
- If your extension takes too long to perform its work, it will be notified and immediately terminated.
- Notification is displayed to the user.
As you can see, when using a notification service extension, you only have a limited amount of time to perform the necessary work. If your extension is taking too long, then it will be stopped by the system, and the notification will be delivered as if you had no extension at all.
Extension limitation
The last important thing to consider when using a notification service extension is the conditions under which the extension will operate. Firstly, your extension will only be launched for notifications which are configured to show on-screen alerts to the user. This means that any silent notifications (like the ones used to update app badges) will not trigger your extension.
Secondly, the incoming notification’s aps dictionary within its payload must include the mutable-content key with a value of 1.
The correct configuration of your notifications will ultimately depend on your app’s own setup. To meet the second condition, in particular, some changes may need to be made to your server-side push notification implementation. If you are not using a custom server and are using instead a third-party service for your push notification implementation, then I would suggest researching and reading through their support documentation if you can’t get your extension to work.
NotificationService.swift
This file use to handle notification content before notification displayed to user. Once notification arrived, the extension download image from url and display in notification banner. I am storing data in shared user default to access this image into main app without opening app using notification.
When you open app normally last downloaded file will always display in main app.
class NotificationService: UNNotificationServiceExtension {

    var contentHandler: ((UNNotificationContent) -> Void)?
    var bestAttemptContent: UNMutableNotificationContent?

    override func didReceive(_ request: UNNotificationRequest, withContentHandler contentHandler: @escaping (UNNotificationContent) -> Void) {
        self.contentHandler = contentHandler
        bestAttemptContent = (request.content.mutableCopy() as? UNMutableNotificationContent)
        let defaults = UserDefaults(suiteName: "group.logistic.test")
        defaults?.set(nil, forKey: "images")
        defaults?.synchronize()

        guard let content = (request.content.mutableCopy() as? UNMutableNotificationContent) else {
            contentHandler(request.content)
            return
        }

        guard let apnsData = content.userInfo["data"] as? [String: Any] else {
            contentHandler(request.content)
            return
        }

        guard let attachmentURL = apnsData["attachment-url"] as? String else {
            contentHandler(request.content)
            return
        }

        do {
            let imageData = try Data(contentsOf: URL(string: attachmentURL)!)
            guard let attachment = UNNotificationAttachment.create(imageFileIdentifier: "image.jpg", data: imageData, options: nil) else {
                contentHandler(request.content)
                return
            }
            content.attachments = [attachment]
            contentHandler(content.copy() as! UNNotificationContent)

        } catch {
            contentHandler(request.content)
            print("Unable to load data: \(error)")
        }
    }

    override func serviceExtensionTimeWillExpire() {
        // Called just before the extension will be terminated by the system.
        // Use this as an opportunity to deliver your "best attempt" at modified content, otherwise the original push payload will be used.
        if let contentHandler = contentHandler, let bestAttemptContent =  bestAttemptContent {
            contentHandler(bestAttemptContent)
        }
    }

}
This UNNotificationAttachment extension function to save the media to disk.
extension UNNotificationAttachment {
    static func create(imageFileIdentifier: String, data: Data, options: [NSObject : AnyObject]?)
        -> UNNotificationAttachment? {
            let fileManager = FileManager.default
            if let directory = fileManager.containerURL(forSecurityApplicationGroupIdentifier: "group.logistic.test") {
                do {
                    let newDirectory = directory.appendingPathComponent("Images")
                    if (!fileManager.fileExists(atPath: newDirectory.path)) {
                        try? fileManager.createDirectory(at: newDirectory, withIntermediateDirectories: true, attributes: nil)
                    }
                    let fileURL = newDirectory.appendingPathComponent(imageFileIdentifier)
                    do {
                        try data.write(to: fileURL, options: [])
                    } catch {
                        print("Unable to load data: \(error)")
                    }

                    let defaults = UserDefaults(suiteName: "group.logistic.test")
                    defaults?.set(data, forKey: "images")
                    defaults?.synchronize()
                    let imageAttachment = try UNNotificationAttachment.init(identifier: imageFileIdentifier,
                                                                            url: fileURL,
                                                                            options: options)
                    return imageAttachment
                } catch let error {
                    print("error \(error)")
                }
            }
            return nil
    }
}
In main app, you have to get image when app open
// ViewController.Swift
let defaults = UserDefaults(suiteName: "group.logistic.test")
if (defaults?.object(forKey: "images") != nil) {
let data = defaults?.value(forKey: "images") as! Data
           iimgNotification.image = UIImage(data: data)
}
Sample notification payload
A very important step for sending media attachment is the mutable-content key in the push payload from the server. So let’s take a look at this example payload
{
   "aps": {
       "alert": "Hello!",
       "sound": "default",
       "mutable-content": 1,
       "badge": 1,
   },
   "data": {
       "attachment-url": "https://abc.com/sample_image.jpg"
   }
}
Finally, I Hope this article will help you to build great product. Below you will find GitHub repository with example.
Thanks


