Hybrid framework provide great way to develop your application with minimal efforts for multiple platform. Sometimes you may want to reuse your existing code of Swift or Java code without writing Javascript or to accomplish some complex logic of Image processing or data processing, etc.
React Native designed in a such way that you will able to integrate your native code and have full access to it. Therefore if React Native does not support native feature you want then you can build your own. To accomplish this you can build your own native modules.
I this article you will learn how to create and implement your native code with your React Native app. This will be demonstrated by to exchange the simple text between React Native code and Native code of iOS and Android. Here is steps we will follow.
Steps to implement with Android
- Native custom view
- View manager for custom view
- Package for view manager and register in MailApplication.java
Steps to implement with iOS
-
Native custom view and bridging header file and SwiftComponetModule.m file
- View manager for custom view
Steps to implement In React Native code
- React native view same as native custom view
- Bridge to connect react native with native code and configure both component in App.js
Native module integration with Android
Native custom view
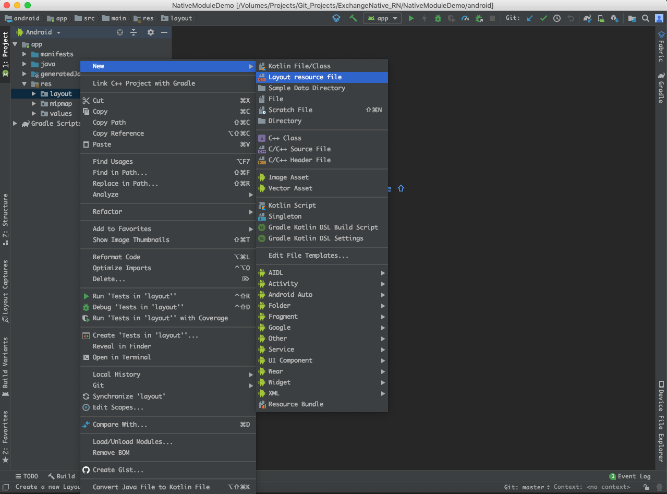
First create layout file in android res/layout (if not create that folder). in which create TextInput ,TextView and Button.
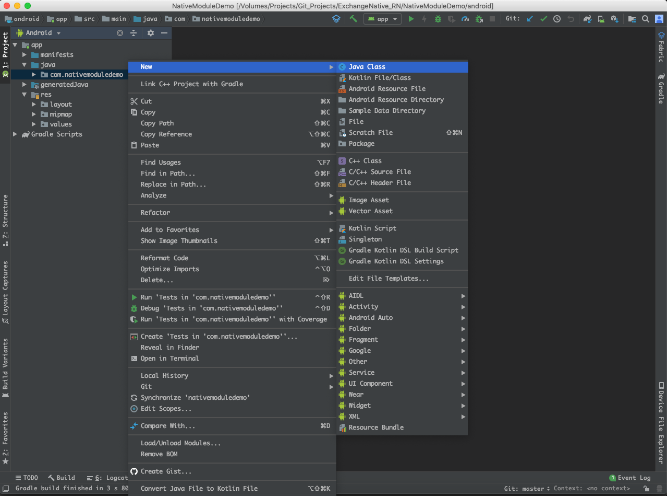
Let’s create .java class for custom layout as show in below image. Initialise layout components as written in below code snippets. Don’t forgot to create getter, setter method and button click event for the view.
public class ExchangeAndroidView extends LinearLayout {
	private Context mContext;

   	private EditText edtCommComp;
        private TextView txtCommComp;
        private Button btnCommComp;

        private OnButtonClick onButtonClick;

   	public ExchangeAndroidView(Context context) {
       		super(context);
       		this.mContext = context;
       		init();
   	}

   	private void init() {
      		View view = inflate(mContext, R.layout.layout_exchange_android, this);
       		edtCommComp = (EditText) view.findViewById(R.id.edt_comm_comp);
       		txtCommComp = (TextView) view.findViewById(R.id.txt_comm_comp);
       		btnCommComp = (Button) view.findViewById(R.id.btn_comm_comp);

       		btnCommComp.setOnClickListener(new OnClickListener() {
           			@Override
           			public void onClick(View view) {
               			if (onButtonClick != null)
                   			onButtonClick.onClick(edtCommComp.getText().toString());
           			}
       		});
   	}

   	public String getInputText() {
       		return edtCommComp.getText().toString();
   	}

   	public void setTextView(String text) {
       		txtCommComp.setText(text);
   	}

   	public void setOnButtonClick(OnButtonClick onButtonClick) {
       		this.onButtonClick = onButtonClick;
   	}

   	public interface OnButtonClick {
       		void onClick(String text);
   	}
}
View manager for custom view
Similarly create, view manager class by File-> new -> JavaClass. This will extends from SimpleViewManagerClass. The view manager class is used to initialise view and update the view. Hence use custom class that created earlier.
…
}
@Override
protected ExchangeAndroidView createViewInstance(ThemedReactContext reactContext) {
   	ExchangeAndroidView exchangeAndroidView = new ExchangeAndroidView(reactContext);
   	onReceiveNativeEvent(reactContext, exchangeAndroidView);
   	return exchangeAndroidView;
}
As a result create method to pass data to react components while you click on button. You can pass data using ‘WritableMap’ to React component and it will be done by using ‘createViewInstance’ method.
public void onReceiveNativeEvent(final ThemedReactContext reactContext, final ExchangeAndroidView exchangeAndroidView) {
   	exchangeAndroidView.setOnButtonClick(new ExchangeAndroidView.OnButtonClick() {
       	@Override
       	public void onClick(String text) {
           		WritableMap event = Arguments.createMap();
           		event.putString(“nativeObject”, text);
         reactContext.getJSModule(RCTEventEmitter.class).receiveEvent(exchangeAndroidView.getId(), "topChange", event);
       }
   });
}
Likewise you have to create method with setting text in custom view’s TextView while React Component button clicked. This method gets called while props “nativeText” of the react native code gets changed.
@ReactProp(name = “nativeText")
public void setAndroidText(ExchangeAndroidView exchangeAndroidView, String text) {
   	exchangeAndroidView.setTextView(text);
}
Package for view manager and register in MailApplication.java
You need to create the react package for the view manager class. For that create new java class that implements ReactPackage interface as below.
@Override
public List<ViewManager> createViewManagers(ReactApplicationContext reactContext) {
   return Collections.<ViewManager>singletonList(
           new ExchangeAndroidViewManager()
   );
}
Subsequently mention this package in ‘getPackages’ method of ’MainApplication.java’ class.
@Override
protected List<ReactPackage> getPackages() {
   return Arrays.<ReactPackage>asList(
           new MainReactPackage(), new ExchangeAndroidViewPackage()
   );
}
Native module integration with iOS
Native custom view and bridging header file and SwiftComponetModule.m file
Likewise create new swift file with custom view design of ‘TextField’,’Label’ and ‘Button’ in native side and initialise swift file with iOS code and create update method and button click event for the view.
class NativeView: UIView {
    var onChange: RCTBubblingEventBlock?

  let label = UILabel()
  let txtField = UITextField()
  var btn:UIButton!

  private var _nativeText:String?

  var nativeText: String? {
    set {
      _nativeText = newValue
    }
    get {
      return _nativeText
    }
  }
  override init(frame: CGRect) {
    super.init(frame: frame)
    self.addCustomView()
  }

  required init(coder aDecoder: NSCoder) {
    fatalError("init(coder:) has not been implemented")
  }

  func addCustomView() {
    txtField.frame = CGRect(x: 32, y: 30, width: 300, height: 30)
    txtField.placeholder = "Enter Text"
    txtField.isUserInteractionEnabled = true

    label.frame = CGRect(x: 32, y: 90, width: 200, height: 30)
    label.textColor = UIColor.gray
    label.text = "Text"

    btn = UIButton.init(type: .custom)
    btn.frame = CGRect(x: 32, y: 120, width: 300, height: 30)
    btn.backgroundColor=UIColor.gray
    btn.setTitle("Click Here", for: UIControlState.normal)
    btn.addTarget(self, action: #selector(pressButton(_:)), for: .touchUpInside)

    self.addSubview(txtField)
    self.addSubview(label)
    self.addSubview(btn)
  }
  func updateValue() {

    label.text = nativeText as? String
  }
  @objc func pressButton(_ sender: UIButton){

    if onChange != nil {
      onChange!(["nativeObject": txtField.text!])
    }
  }
}
So once created swift class in addition create bridging header file which will help to communicate between Swift code and Objective C code as written below in header file.
#import <React/RCTBridgeModule.h>
#import <React/RCTViewManager.h>
#import <React/RCTBridge.h>
#import <React/RCTUIManager.h>
React Native will not export any function of class you have created to React Javascript unless explicitly done. For this you need to use RCT_EXPORT_METHOD() macros. This will exposed all property of class created to Javascript object. RCT_EXPORT_METHOD support all type of conversion like(NSString to string, NSInteger float double, CGFloat NSNumber to number, BOOL to boolean, NSArray to array, NSDictionary to key and value of object of other types, RCTResponseSenderBlock to function). As a result update code of SwiftComponetModule.m is as below.
#import <Foundation/Foundation.h>
#import <React/RCTBridgeModule.h>
#import <React/RCTViewManager.h>
@interface RCT_EXTERN_MODULE(SwiftComponentManager, RCTViewManager)
RCT_EXPORT_VIEW_PROPERTY(nativeText, NSString)
RCT_EXPORT_VIEW_PROPERTY(onChange, RCTBubblingEventBlock)
RCT_EXTERN_METHOD(updateValueViaManager:(nonnull NSNumber *)node)

@end
View manager for custom view
Firstly create RCTViewManager class. The RCTViewManager class is the root most of React Native class in iOS which has ability to behave as Objective C object. You have to pass class to function @objc before inherited from RCTViewManager which makes this class available to Objective C.
@objc (SwiftComponentManager)
class SwiftComponentManager: RCTViewManager {
  override func view() -> UIView! {
    return NativeView()
  }

…
}
Finally below function needed to update view using manager class.
func updateValueViaManager(_ node:NSNumber) {
  DispatchQueue.main.async {
    let myLabel = self.bridge.uiManager.view(forReactTag: node) as! NativeView
    myLabel.updateValue()
  }
}
Implementation with React Native
React custom component same as native custom view
After that, create same custom view in React Native like you have created for iOS and Android. For this let’s create React Component using TextInput, Text and TouchableOpacity as written in below code snippets.
….
<View style={styles.container}>
	<TextInput style={styles.textInputStyle} onChangeText={this.onChangeText} />
	<Text style={styles.instructions}>{textData}</Text>
	<TouchableOpacity style={styles.buttonStyle} onPress={this.onButtonClick}>
		<Text style={styles.textStyle}>Click Here</Text>
	</TouchableOpacity>
</View>
…
While button clicked in React Component it will update Native view using below code.
….
onButtonClick = () => {
	const { inputText } = this.state;
	this.setState({
		nativeText: inputText,
	});
	setTimeout(() => {
		if (Platform.OS === 'ios') {
		UIManager.dispatchViewManagerCommand(
		ReactNative.findNodeHandle(this.mySwiftComponentInstance),
		UIManager.SwiftComponent.Commands.updateValueViaManager,
		[]
		);
	}
	}, 300);
};
Bridge to connect react native with native code and configure both component in App.js
In addition you need to create the bridge for the component to communicate with each other.
import { requireNativeComponent, View } from 'react-native';
…

const NativeComponent = requireNativeComponent('SwiftComponent');

…

<NativeComponent
    style={styles.nativeCompView}
    nativeText={nativeText}
    onChange={this.onSetText}
    ref={this.setRef}
    />

…
Hence, onChange function props called when native button click and the handler of that function at React Native side receive the value in event.nativeEvent
onSetText = event => {
	this.setState({ textData: event.nativeEvent.nativeObject });
};
Finally you have your own native module integrated with your React Native application. With the help for native module you can implement any Native features which are not available in React Native or code you have developed before and want to reuse it.