Apple Pay is easy and secure mobile payment services provided by Apple. User can make payments online in supported apps, stores, restaurants and on the web. You can also send money via Apple Pay from messages. User can store credit cards, debit cards, store cards, and loyalty cards safely in Wallet App. It is available in the United States, Canada, United Kingdom, Brazil, Australia, United Arab Emirates, China, Saudi Arabia, Singapore, New Zealand, Japan, Hong Kong, Taiwan, Germany, and other European Nations. User with iPhone6 and newer can use this service.
It is more convenient to use this than the physical card because Apple doesn’t store actual card details. So it reduces the risk for merchants as well as app developers to manage actual card data. It supports Visa, MasterCard, American Express, UnionPay and Discover Card.
Setting up Certificates
You need Apple Developer Account for Apple Pay implementation.
Follow the steps to create App Id.
1. Sign in to your developer account.
2. Select “Certificate, Identifiers, and Profiles” option.
3. Select “App IDs” from the menu and then Click on “+” icon on the top right side.
4. Check the ‘Apple Pay’ option from App Services. Click Continue and then submit

Follow the steps to create Merchant Id.
1. Sign in to your developer account.
2. Select “Certificate, Identifiers, and Profiles” option.
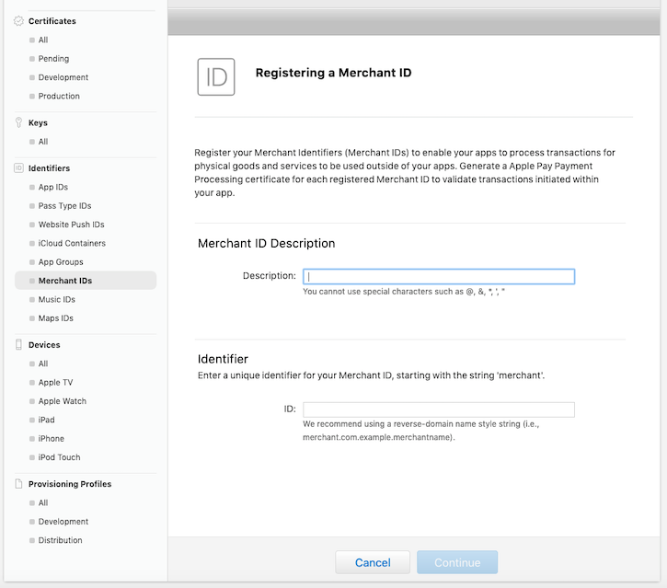
3. Select “Merchant IDs” from the menu and then Click on “+” icon on the top right side.
4. Add Merchant Id description and unique identifier. Click on Continue.
Follow the step for creating Payment Processing Certificates.
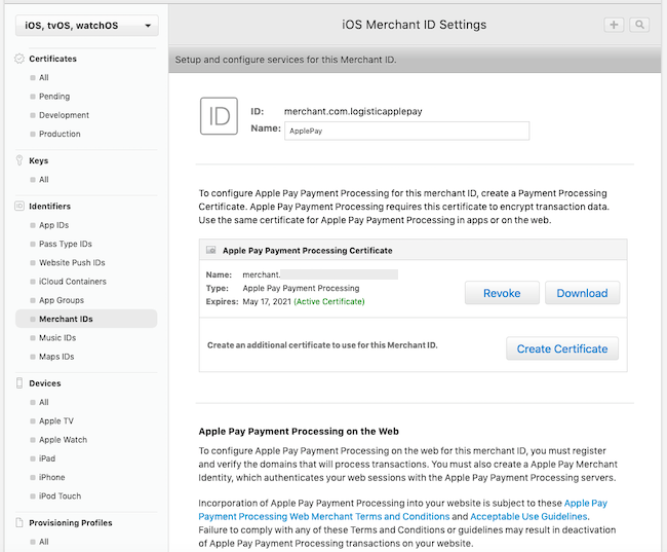
1. Click on the Merchant ID which is created earlier by you.
2. Click on Edit button. The following screen will open.
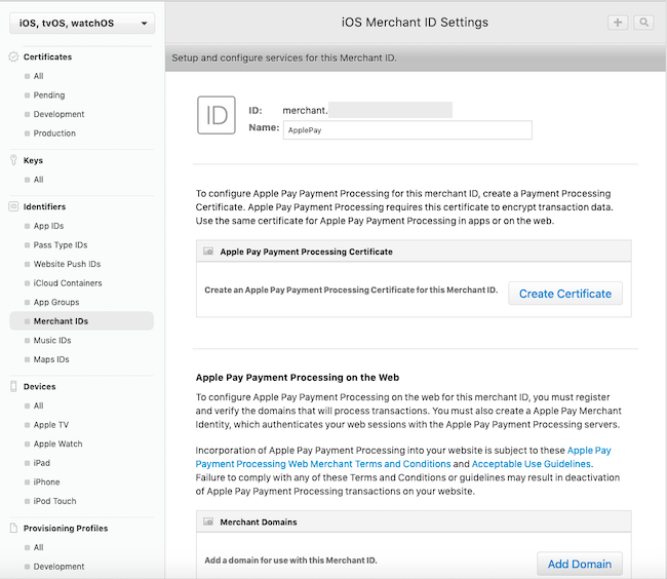
3. Click on “Create Certificate” button. You need to upload CertificateSigningRequest that created on your mac.
4. To create this certificate, open “Keychain Access” on your mac.
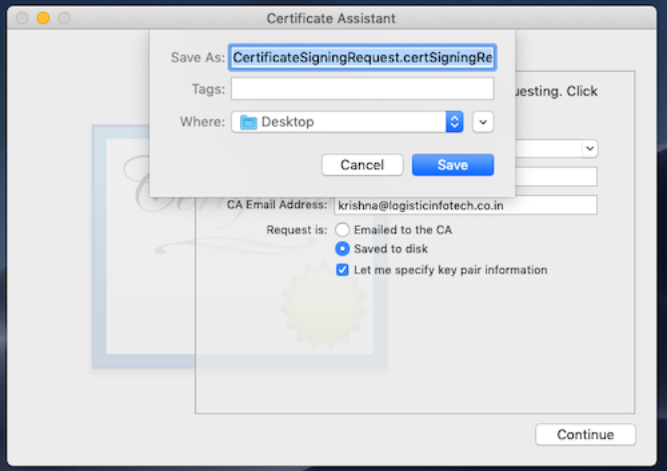
5. Select “Certificate Assistant” and then select “Request a Certificate from a Certificate Authority…” The following screen will open.
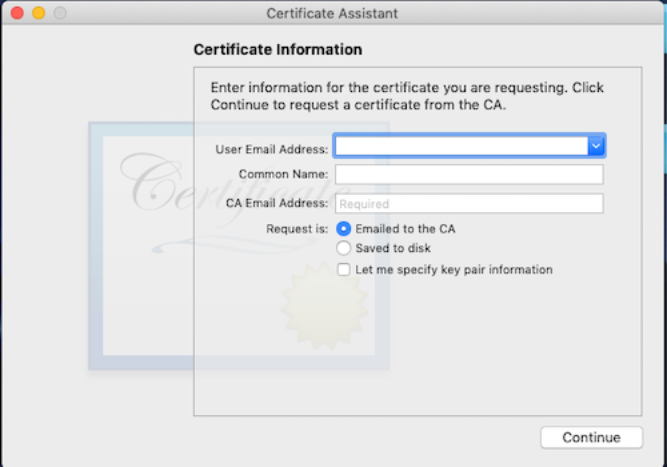
6. Fill the details. Select “Saved to disk” and “Let me specify key pair information”. Click Continue button.
7. Save CSR to your mac.
8. Select “ECC” for algorithm and “256 bits” for key size. Click Continue.
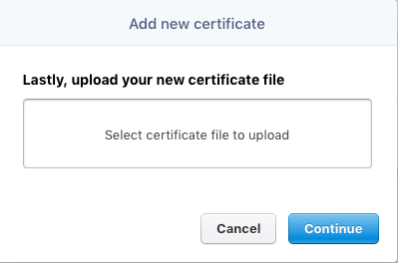
9. Upload this downloaded CSR to the Payment Processing Certificate.
10. Download Apple generated certificate and install it in Keychain Access.
Now your certificate is ready. You need to set up Apple Pay in your Xcode Project.
Setting up an Xcode Project
Create Xcode project with the same bundle identifier which you used for creating App Id then select your Development team.
Note: If you are not using Automatically manage signing, then you need to add your MerchantID to your provisional profile.
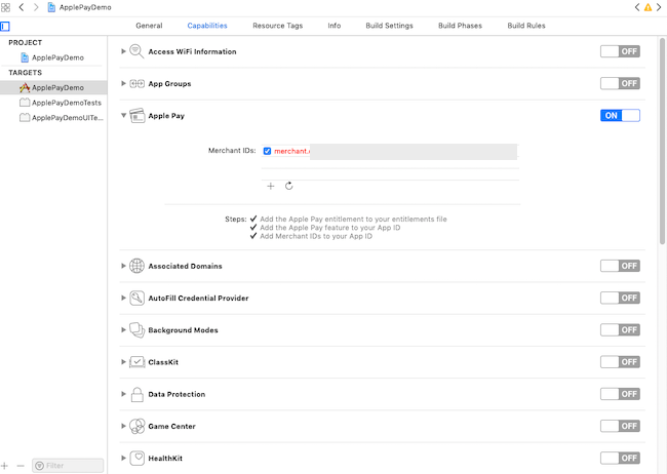
Click on Capabilities and turn on Apple Pay switch. You will see the merchant id which created in developer account. If merchant id is not displayed automatically, you can add it manually.
Follow the steps for coding
1. Open storyboard. Add view for Apple Pay Button and give its outlet to the ViewController.swift. You can also add some design for purchase item.
2. Import PassKit framework to the ViewController.swift file.
3. Add this function for adding Apple Pay button to the view by the following code.
func addApplePayButton ()
{
    let btnApplePay: PKPaymentButton
    btnApplePay = PKPaymentButton(paymentButtonType: .buy, paymentButtonStyle: .black)
    btnApplePay.addTarget(self, action:#selector(payByApplePay), for: .touchUpInside)
    btnApplePay.frame = CGRect.init(x: 0, y: 0, width: self.viewApplePayBtn.frame.width, height: self.viewApplePayBtn.frame.height)
    viewApplePayBtn.addSubview(btnApplePay)
}
4. Call this function from ViewDidLoad method.
5. We have added payByApplePay to the target of apple pay button. So need to add this method.
6. Create paymentSummary Item
let summaryItem = PKPaymentSummaryItem(label: "Apple iPhone 8 Plus", amount: NSDecimalNumber(string: "699.0"))
7. Create Payment Request
let paymentRequest = PKPaymentRequest()
paymentRequest.currencyCode = "USD"
paymentRequest.countryCode = "US"
paymentRequest.merchantIdentifier = "Your marchant id"
paymentRequest.merchantCapabilities = PKMerchantCapability.capability3DS
paymentRequest.paymentSummaryItems = [summaryItem]
paymentRequest.supportedNetworks = paymentNetworks
8. Create payment network and you can add as per requirements
let paymentNetworks = [PKPaymentNetwork.visa, .discover, .masterCard, .amex]
9. Add all this into the following condition
if PKPaymentAuthorizationViewController.canMakePayments(usingNetworks: paymentNetworks)
{

}
10. Create Payment Authorization controller
guard let objApplePayVC = PKPaymentAuthorizationViewController(paymentRequest: paymentRequest)
else
{
    print("Apple pay is not configured properly")
    return
}
objApplePayVC.delegate = self
self.present(objApplePayVC, animated: true, completion: nil)
Now complete method will look like below
@objc func payByApplePay()
{
    let summaryItem = PKPaymentSummaryItem(label: "Apple iPhone 8 Plus", amount: NSDecimalNumber(string: "699.0"))
    let paymentNetworks = [PKPaymentNetwork.visa, .discover, .masterCard, .amex]
    if PKPaymentAuthorizationViewController.canMakePayments(usingNetworks: paymentNetworks) {
        let paymentRequest = PKPaymentRequest()
        paymentRequest.currencyCode = "USD"
        paymentRequest.countryCode = "US"
        paymentRequest.merchantIdentifier = "merchant.com.logisticapplepay"
        paymentRequest.merchantCapabilities = PKMerchantCapability.capability3DS
        paymentRequest.paymentSummaryItems = [summaryItem]
        paymentRequest.supportedNetworks = paymentNetworks
        guard let objApplePayVC = PKPaymentAuthorizationViewController(paymentRequest: paymentRequest)
        else {
            print("Apple pay is not configured properly")
            return
        }
        objApplePayVC.delegate = self
        self.present(objApplePayVC, animated: true, completion: nil)
    }
}
11. Add PKPaymentAuthorizationViewControllerDelegate to viewcontroller and implement its delegate methods.
extension ViewController: PKPaymentAuthorizationViewControllerDelegate
{
    func paymentAuthorizationViewController(_ controller: PKPaymentAuthorizationViewController, didAuthorizePayment payment: PKPayment, handler completion: @escaping (PKPaymentAuthorizationResult) -> Void)
    {
        print("Payment : \(payment)")
        let result = PKPaymentAuthorizationResult(status: .success, errors: nil)
        completion(result)
    }
    func paymentAuthorizationViewControllerDidFinish(_ controller: PKPaymentAuthorizationViewController)
    {
        controller.dismiss(animated: true){}
    }
}
The first method will call when a user authorise payment via TouchId, PassCode or FaceId. And the Second method will call in case of Payment is done or canceled.
Now, you run your project and you can see the following screen.
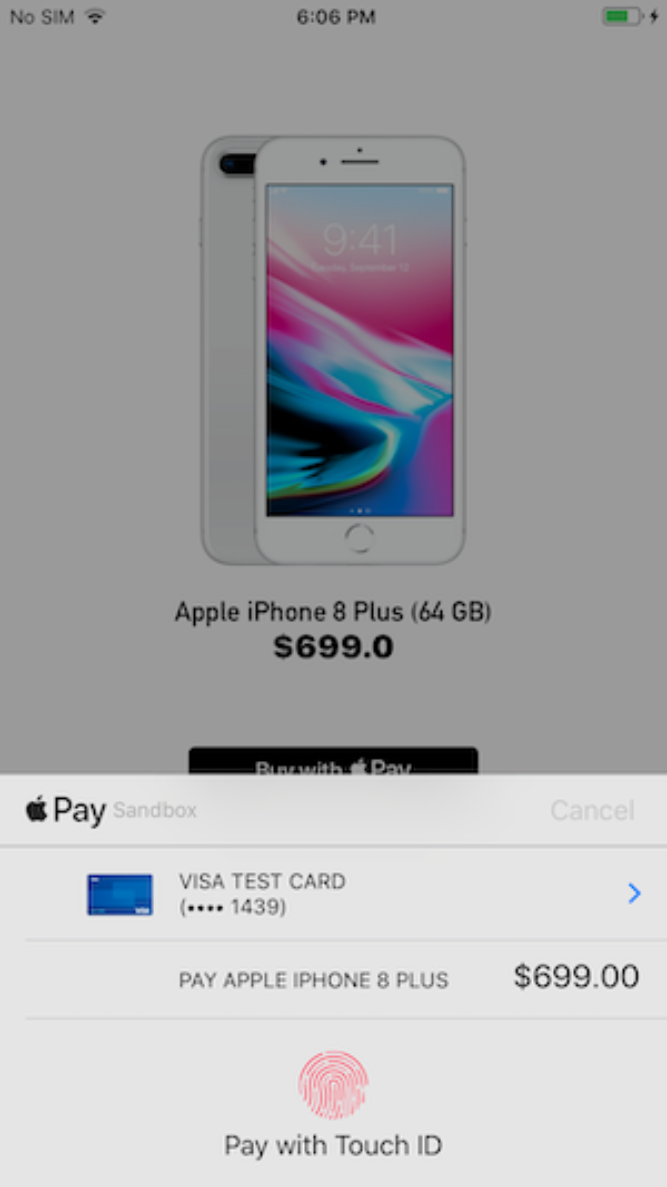
Apple Pay is successfully implemented but for the actual payment transaction, you need to add backend to fetch payment. Stripe is the easiest way to support Apple Pay
Setting up Stripe Account
1. Login to stripe account through https://dashboard.stripe.com/login .
2. Click on Payments from the left side menu.
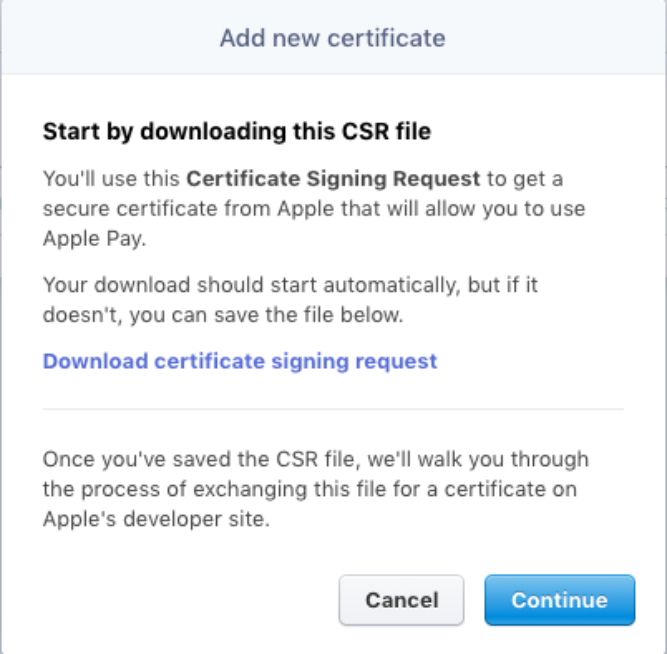
3. Click on Apple Pay and then click on “Add new application” button.
A Popup window will open and download Stripe.certSingingRequest file.
4. Go to Apple Developer account and go back to earlier created Merchant Id. and click on Edit button.
5. Revoke the Payment Processing Certificate and add newly created Stripe.certSingingRequest.
6. Download new Apple Pay Payment Processing Certificate
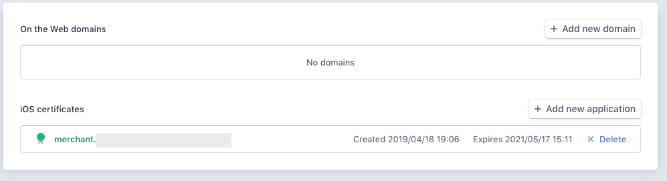
7. Go back to the stripe account and add the newly downloaded certificate to the Stripe. And Click on the Continue button.
Merchant Id will display under iOS Certificates.
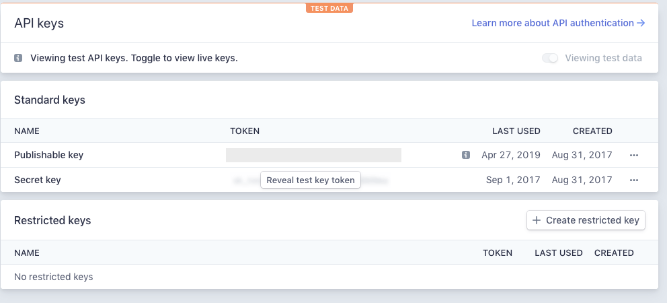
8. Select API option from the left side menu. You will see Publishable key and Secret key. We will use this key to our project code.
Back to Xcode Project with stripe
We need to add pod file for Stripe. Add following code to pod file and install the pod.
pod ‘Stripe’
Import Stripe in AppDelegate file. and add the following code to didFinishLaunchingWithOptions method.
STPPaymentConfiguration.shared().publishableKey = “your publishable key“
STPPaymentConfiguration.shared().appleMerchantIdentifier = “your merchant identifier“
We need to change few code in PayByApplePay function
1. Create new payment request object with Stripe
let paymentRequest = Stripe.paymentRequest(withMerchantIdentifier: STPPaymentConfiguration.shared().appleMerchantIdentifier!, country: "US", currency: "USD")
2. Check whether payment request can be submitted or not by following condition
if Stripe.canSubmitPaymentRequest(paymentRequest)
{
}
3. Now complete new method will look like
@objc func payByApplePay()
{
    let paymentRequest = Stripe.paymentRequest(withMerchantIdentifier: STPPaymentConfiguration.shared().appleMerchantIdentifier!, country: "US", currency: "USD")
    let summaryItem = PKPaymentSummaryItem(label: "Apple iPhone 8 Plus", amount: NSDecimalNumber(string: "699.0"))
    paymentRequest.paymentSummaryItems = [summaryItem]
    if Stripe.canSubmitPaymentRequest(paymentRequest)
    {
        let objApplePay = PKPaymentAuthorizationViewController(paymentRequest: paymentRequest)
        objApplePay?.delegate = self
        self.present(objApplePay!, animated: true, completion: nil)
    }
    else
    {
        print("Apple pay is not configured properly")
        print("Please add card to your account.")
    }
}
4. Now we will create stripe token from payment object which will get in following delegate method. We can send this token to the backend and actual payment transaction can be done by this token to backend side.
func paymentAuthorizationViewController(_ controller: PKPaymentAuthorizationViewController, didAuthorizePayment payment: PKPayment, handler completion: @escaping (PKPaymentAuthorizationResult) -> Void)
{
    print("Payment : \(payment)")
    STPAPIClient.shared().createToken(with: payment) { (token, error) in
        print("Token : \(String(describing: token))")
        let result = PKPaymentAuthorizationResult(status: .success, errors: nil)
        completion(result)
    }
}
Now, you are all set to make actual transactions using Apple Pay with Stripe.